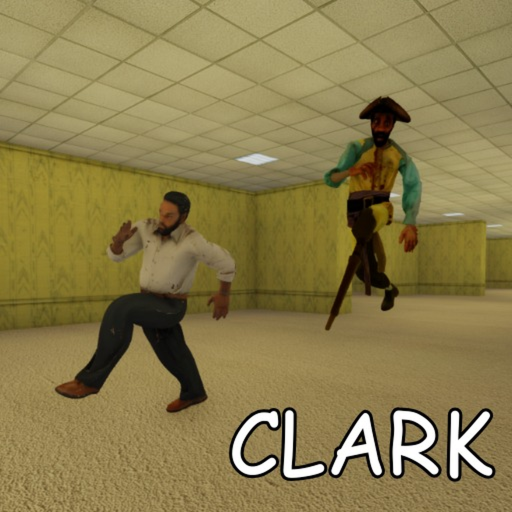
Room Layouts — Clark Huss rooms
Procedural room layout patterns in Clark Huss rooms — hall types, junctions, dead ends, and navigation tactics for Backrooms-style Roblox horror.
Every Clark Huss rooms run is a sentence written in repeating words — long hall, T-junction, niche, dead end — arranged in an order you cannot fully predict until you live it. Players who learn those words navigate procedurals faster than anyone memorising a single screenshot from a TikTok seed. This page catalogues layout archetypes observed in early access sessions after the July 2026 patch, explains how each shape interacts with Clark pressure, and ties movement choices to strategy tiers. It is not a guaranteed spawn atlas; it is a field guide.
Why layouts matter more than coordinates
Procedural GMOD Rooms-inspired design trades fixed cartography for replayable dread. Coordinates from yesterday’s viral clip may never appear in your lobby. Archetypes, however, recur because tile libraries reuse structural modules even when cosmetics shuffle.
When your lead calls “short T ahead,” the squad should instantly know:
- Sightlines are limited but decision latency is low.
- Sprint risk depends on audio rear check.
- Flashlight cone should sweep both branches before commitment.
That shared vocabulary beats pointing at a minimap Husrooms may not offer.
Long axial hallways
Description: Straight yellow corridors extending farther than flashlight cones comfortably reach. Fluorescent hum uniform; side doors sparse.
Navigation doctrine: Default walk speed until rear guard confirms silence via entity sound guide. Sprint only after visual clear to far end or agreed panic word.
Clark interaction: Long halls are S-tier threat vectors — Clark exploits mid-sprint interception if you commit without audio intel. Prefer hugging one wall for slightly narrower exposure while maintaining escape length.
Squad tip: Rear guard stays staggered; do not bunch — collision bumps create noise spikes.
Short connector halls
Description: Brief segments linking junction modules; sometimes barely one sprint length.
Navigation doctrine: Treat as transitions, not camping spots. Pause only for callouts.
Clark interaction: Lower baseline risk unless audio suggests pursuit — short halls still funnel if you hesitate at exit lip.
Squad tip: Lead announces exit type before entering so rear guard prepares turns.
T-junctions
Description: Three-way choices — forward plus left/right branches — often visually symmetric.
Navigation doctrine: Stop before apex; sweep light left, centre, right. Agree branch verbally before splitting. Random splits kill pub squads.
Clark interaction: Classic ambush geometry if Clark patrol intersects from unseen branch. Audio-first rule from survive Clark guide decides whether to commit forward or peel.
Squad tip: Mark chosen branch with short callout (“T right”) for mental breadcrumb — not literal in-game markers.
Four-way crosses
Description: Intersections with four exits; higher disorientation than T-junctions.
Navigation doctrine: Avoid camping centre — exposed from multiple vectors. Pick branch using squad plan or left-hand rule if lost.
Clark interaction: Crossings amplify panic spinning. Pre-assign rear guard to watch back arch while lead chooses.
Squad tip: If two branches look identical, choose consistent bias (always second right) to prevent loops — verify with map hub loop callouts.
Dead-end niches and side closets
Description: Small rooms or alcoves terminating without forward progress; sometimes props suggest safety.
Navigation doctrine: Enter only for deliberate regroup — never as random flee without exit plan.
Clark interaction: Dead ends convert B-tier disorientation into A-tier deaths when Clark follows. If entering, mute sprint instantly and prepare backtrack timing.
Squad tip: Never whole-squad stack in niche — one scout in, others cover mouth.
Loop modules
Description: Circular paths returning to same junction with offset corridors.
Navigation doctrine: Recognise loops via repeated props or lead callout memory. Loops waste battery if you circle twice unknowingly.
Clark interaction: Loops extend chase duration — use intentional loops only when audio confirms safe distance for regroup.
Squad tip: If lost, announce “possible loop” to switch navigation strategy to wall rule temporarily.
Vertical transitions
Description: Stairs or short elevation changes between horizontal tiles — less common but memorable in clips.
Navigation doctrine: Slow ascent/descent — footstep pitch changes telegraph position. Hold interact prompts if doors gating verticality appear in future patches.
Clark interaction: Vertical audio is distinctive; use for squad sync (“stairs up”) so rear guard adjusts echo expectations.
Squad tip: Mobile players read mobile controls for jump mis-taps on stair lips.
Open tile versus cluttered tile
Description: Some modules spawn sparse furniture; others add props increasing visual noise.
Navigation doctrine: Clutter reduces long sightlines but creates corner peek games — slice with PC strafe controls or mobile equivalent.
Clark interaction: Clutter helps hide stationary players but punishes sprint collisions — walk near dense prop clusters.
Layout mistakes ranked
| Mistake | Typical layout | Tier impact |
|---|---|---|
| Sprinting blind into T | T-junction | S-tier Clark risk |
| Whole squad dead-end stack | Niche | A-tier wipe |
| Split without callouts | Four-way | B-tier disorientation |
| Loop panic | Loop module | B-tier battery drain |
Cross-link deaths to entity tier list during post-run review.
Patch evolution watch
Mothem_XD may add modules during early access updates — maintenance hallways, pit tiles, interactive lore rooms. We append archetypes when:
- Three independent sources confirm repetition across patches.
- Patch notes reference generation changes.
Until then, treat leaked screenshots as F-tier noise per tier list policy.
Practice drills
- Solo low-stress run: verbalise archetype names aloud each junction.
- Duo run: rear guard only speaks audio; lead only speaks layout — merge data.
- Trio run: apply multiplayer roles with layout vocabulary test.
- Post-run: map deaths to layout class, not just “Clark got us.”
Related reading
- Map hub — navigation philosophy and minimap expectations.
- How to play — GMOD Rooms inspiration context.
- Flashlight batteries — cone management per layout type.
- Tools sound guide — hear junctions before you see them.
Layouts are the alphabet; runs are the stories. Learn the letters and Clark reads less like random bad luck.
Frequently Asked Questions
Quick answers to the most common questions.
Are room layouts the same every run?
Order and combination vary, but archetypes like long halls and T-junctions repeat across procedural seeds.
What is the safest junction type?
None are safe — short connectors with confirmed audio clear are lower risk than long halls or dead ends.
How do squads call out layouts?
Use simple terms: long hall, T left/right, dead end, loop — avoid compass unless pre-agreed.
Can Clark spawn in any layout?
Patrol paths are dynamic. Any geometry can become dangerous if you sprint without audio checks.
Do layouts change after patches?
Tile libraries can update during shutdowns. Re-read patch notes when generation changes are mentioned.
Where do I learn movement for these layouts?
Start with controls pages and the how-to-play guide, then practise callouts in multiplayer.